The BONE token in the Shiba ecosystem is a governance token earned for providing liquidity. BONE allows the community to vote for proposals they like or submit their own. The more BONE tokens you own, the more significant your vote is.
If you have chosen to be a liquidity provider, there will come a time when you will want to redeem your rewards. And for it to work, you need to add BONE to MetaMask first.
BONE is running on the Ethereum network, the same as the rest of the Shiba ecosystem, so it is very easy to add to MetaMask.
| TL;DR |
|---|
| To add BONE to MetaMask ensure you have the Ethereum network selected and select to import a new token. |
| Get the BONE contract address and add it as a custom token. |
Let’s take a look at the process up close.
How to Add BONE to MetaMask on the Ethereum Network
We often get questions about whether the balance is lost if you send tokens to MetaMask before adding the token as a custom token.
And the answer is NO. If you have already withdrawn your tokens from ShibaSwap only to find out that they did not appear automatically in your wallet, the assets are not lost. They are still present on the wallet address that you can check using a block explorer.
Once you add the token in question as a custom token, it will load up your balance. And if your question was regarding BONE, here’s how to add it.
1. Unlock your MetaMask Wallet and Ensure you are using the Ethereum Mainnet
The first thing you must do is unlock your wallet with your password.
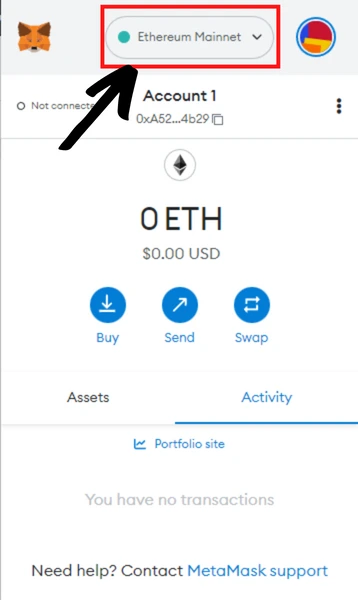
Once you arrive at the extension overview, make sure the correct network is selected: Ethereum, in this case. Clicking on the currently selected network will bring down a list of available networks you can switch to.
2. Select “Import Tokens”
At the bottom of the “Assets” page, you will find an “Import tokens” button.
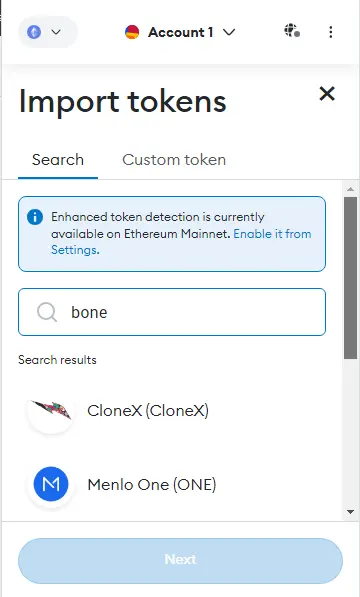
There’s a dedicated “Search” page where you can search for custom tokens. But currently, it seems to not pick up the BONE token.
Both the network and the wallet are constantly upgrading and evolving. Maybe you will have more luck, and the token will show up.
If that’s not your case, switch the tabs to the “Custom token.”
3. Find the BONE Contract Address and Copy It
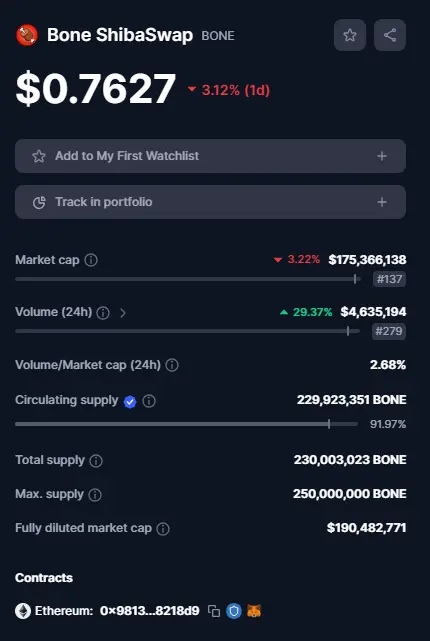
Now, you need to get the token’s contract address from a reputable source. We usually go with CoinMarketCap, but if you know of any other platform that lists contract addresses and that you can trust, feel free to source contracts there.
Visit the BONE page on CoinMarketCap and look for the “contracts” section.
BONE comes only on the Ethereum network, so the correct contract is the first one you can see.
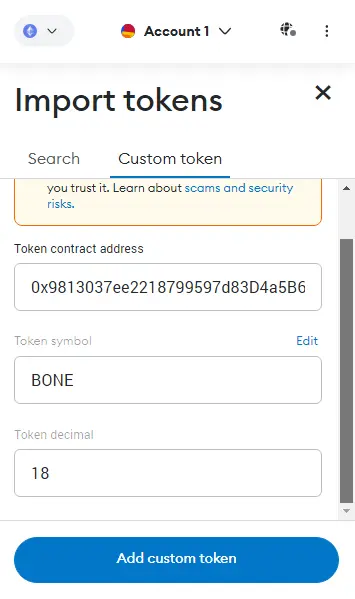
4. Add BONE as a Custom Token
Once you’ve copied the contract, you can go back to the MetaMask extension and paste it into the “Token Contract Address” field.
If you’ve entered the correct contract address, the other two fields should autofill with BONE as the token symbol and 18 as the token decimal.
After selecting the “Add custom token” button, BONE will appear as one of your tokens under the Ethereum network, and you can send, receive, and store it as you please!

